

Reconstituting peptides properly is one of the most important — and most overlooked — parts of peptide handling. A high-quality peptide can be degraded quickly if it’s mixed incorrectly, handled roughly, or exposed to contamination.
This guide walks through the general process of reconstituting lyophilized (freeze-dried) peptides in a clean, careful way, based on common best practices used in research and clinical settings.
(Always consult a qualified medical professional before using any peptide.)
What Does “Reconstituting” a Peptide Mean?
Most peptides arrive as a lyophilized powder inside a sealed vial. Reconstitution simply means adding a sterile liquid — typically bacteriostatic water — to turn that powder into a liquid solution.
Once reconstituted, peptides become far more sensitive to:
- Heat
- Light
- Physical agitation
- Bacterial contamination
That’s why technique matters.
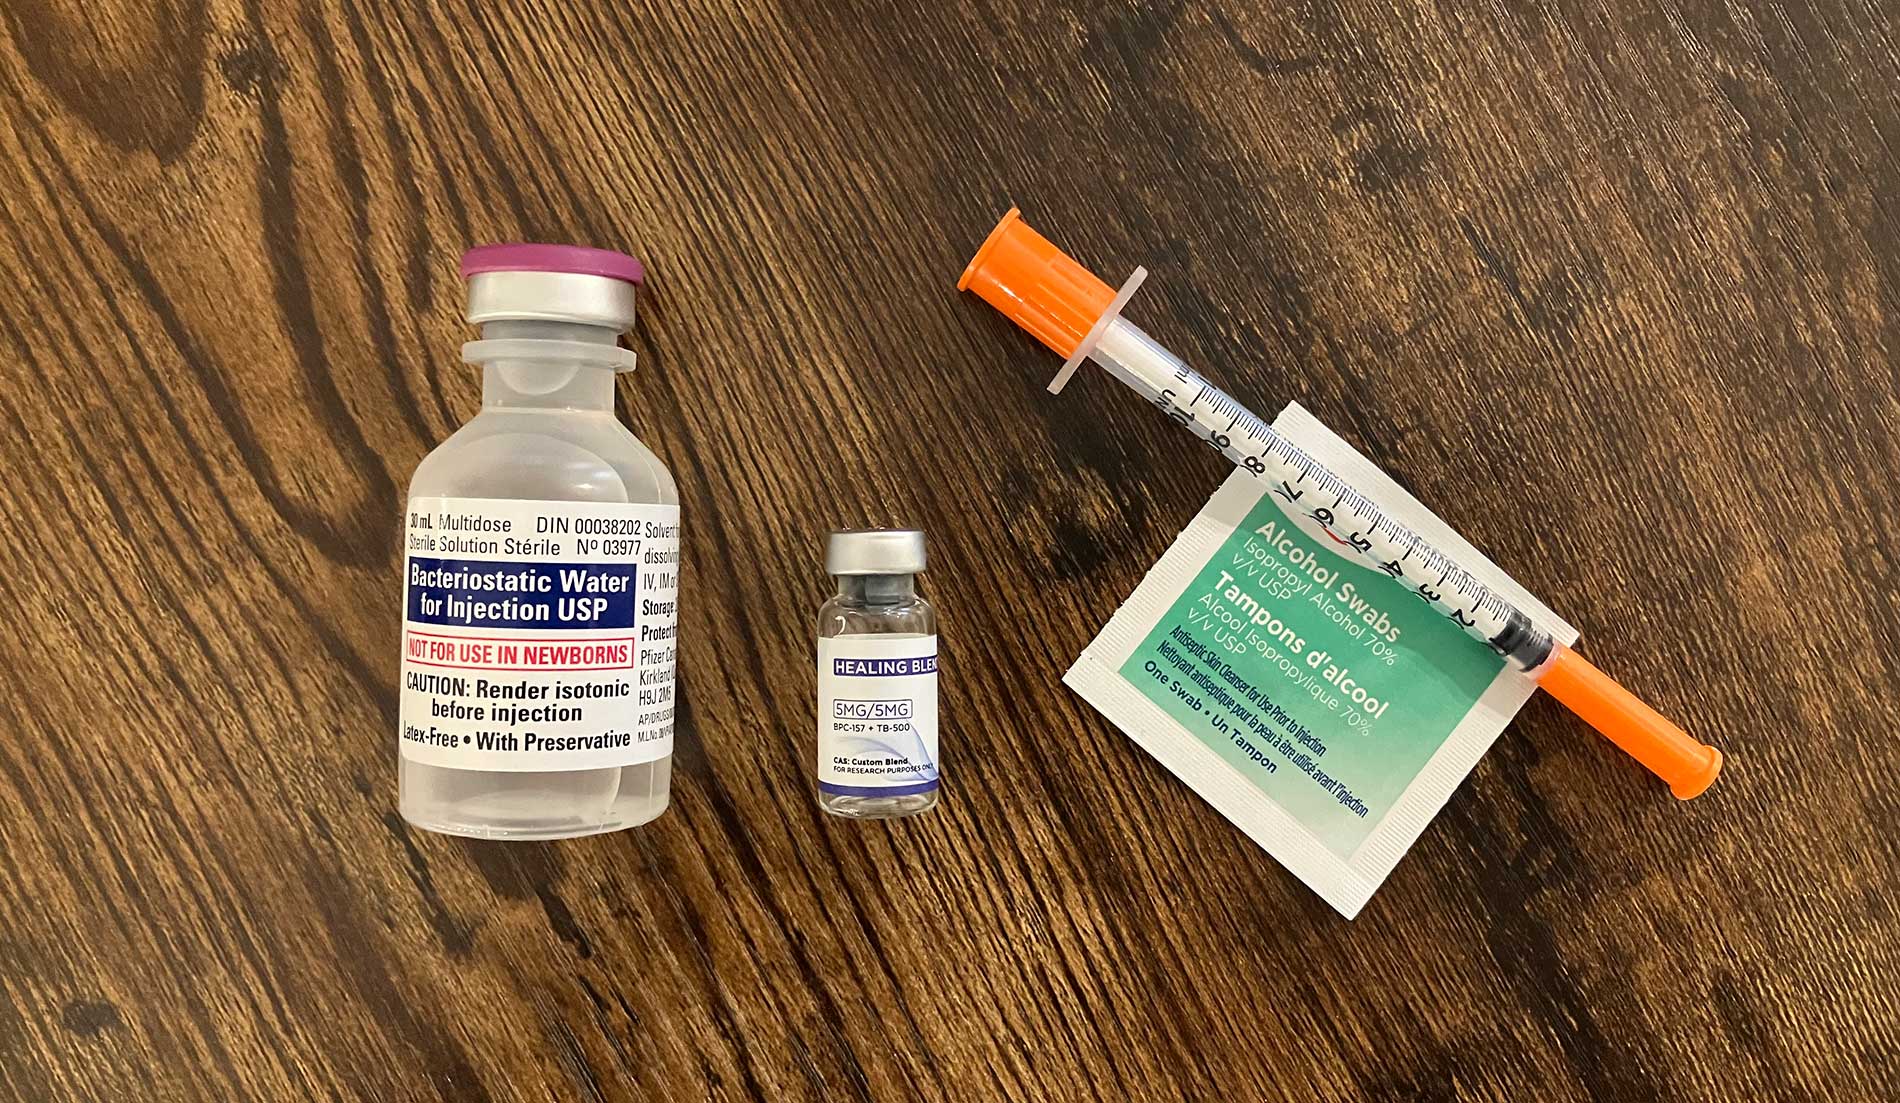
What You’ll Need Before You Start
Before opening anything, make sure you have:
- Lyophilized peptide vial
- Bacteriostatic water (or sterile water, if directed)
- Insulin syringe (commonly 0.5 mL, or 1 mL)
- Alcohol prep pads
- A clean, well-lit workspace
Wash your hands thoroughly and avoid working in areas with airflow, pets, or dust.
Allow Frozen Peptides to Reach Temperature Before Reconstitution
If a lyophilized peptide has been stored in the freezer, allow the vial to fully thaw and reach refrigerator or room temperature before reconstitution. This helps prevent condensation from forming inside the vial, which can introduce moisture and negatively affect peptide stability.
Step 1: Clean Everything First
This step sounds obvious, but it’s where most contamination happens.
- Wipe the rubber stopper on the peptide vial with an alcohol pad
- Wipe the rubber stopper on the bacteriostatic water vial
- Let both air-dry for a few seconds
Do not touch the rubber stoppers after cleaning them.
Step 2: Draw Air Into the Syringe First
Before drawing any liquid:
- Pull back the syringe plunger to draw in air equal to the amount of water you plan to draw
- Insert the needle into the bacteriostatic water vial
- Inject the air into the vial
This equalizes pressure and makes the water much easier to draw out smoothly.
Step 3: Draw the Bacteriostatic Water
- Keep the vial upside down
- Slowly pull back the plunger to your desired volume
- Avoid pulling too quickly, which can introduce bubbles
If you want to double-check your math, this is where using our peptide calculator is extremely helpful.
Peptide Life reconstitution & dose Peptide Calculator.
Using Smaller Insulin Syringes
Many insulin syringes have a limited capacity (often 0.5 mL or 1 mL). If the total amount of bacteriostatic water needed exceeds the size of your syringe, simply repeat the same clean drawing and injection steps until the full volume has been added.
Each draw should follow the same process: clean the vial, inject air, draw the water slowly, and gently add it to the peptide vial at an angle.
Step 4: Inject Water Into the Peptide Vial (Angle Matters)
This is a very important part of the process.
- Insert the needle into the peptide vial
*note HOLD the plunger when inserting the needle as the vial may have back pressure which will suck the water in too rapidly. - Angle the needle so the water runs down the inside wall of the vial
- Inject slowly and gently
❌ Do not spray the water directly onto the powder
❌ Do not force the plunger
Some peptides are fragile, and aggressive pressure can damage their structure.
Discard the Needle After Reconstitution
Once reconstitution is complete, dispose of the needle and syringe used for mixing. Needles become dull after puncturing vial stoppers and should never be reused for injection, as this can cause unnecessary tissue irritation and discomfort.
Step 5: Let the Peptide Dissolve Naturally
Once all the water is added:
- Remove the needle
- Let the vial sit upright for a minute or two
If powder remains:
- Gently roll the vial between your fingers
- Or tilt it slowly side to side
❌ Never shake the vial
Shaking can denature peptides and reduce effectiveness.
Step 6: Inspect the Solution
A properly reconstituted peptide should be:
- Clear and colourless
- Free of floating particles or cloudiness
If the solution looks cloudy or contains debris, do not use it.
Common Reconstitution Mistakes to Avoid
- Skipping alcohol wipes
- Injecting water too forcefully
- Shaking instead of gently rolling
- Using non-sterile tools
- Reconstituting more than needed at once
Small mistakes here can significantly reduce peptide stability.
Final Thoughts
Reconstituting peptides isn’t complicated, but it does require patience and care. Taking an extra minute to do things properly helps preserve peptide integrity and consistency.
If you’re unsure about volumes or concentrations, using a peptide calculator can eliminate guesswork and help you reconstitute accurately every time.
After your peptide is fully reconstituted, storage is very important, see our storage guide.
Educational Disclaimer
This content is for informational and educational purposes only and does not constitute medical advice. Always consult a licensed healthcare professional before using peptides or injectable compounds.